 Important Safety Information
« Click Here
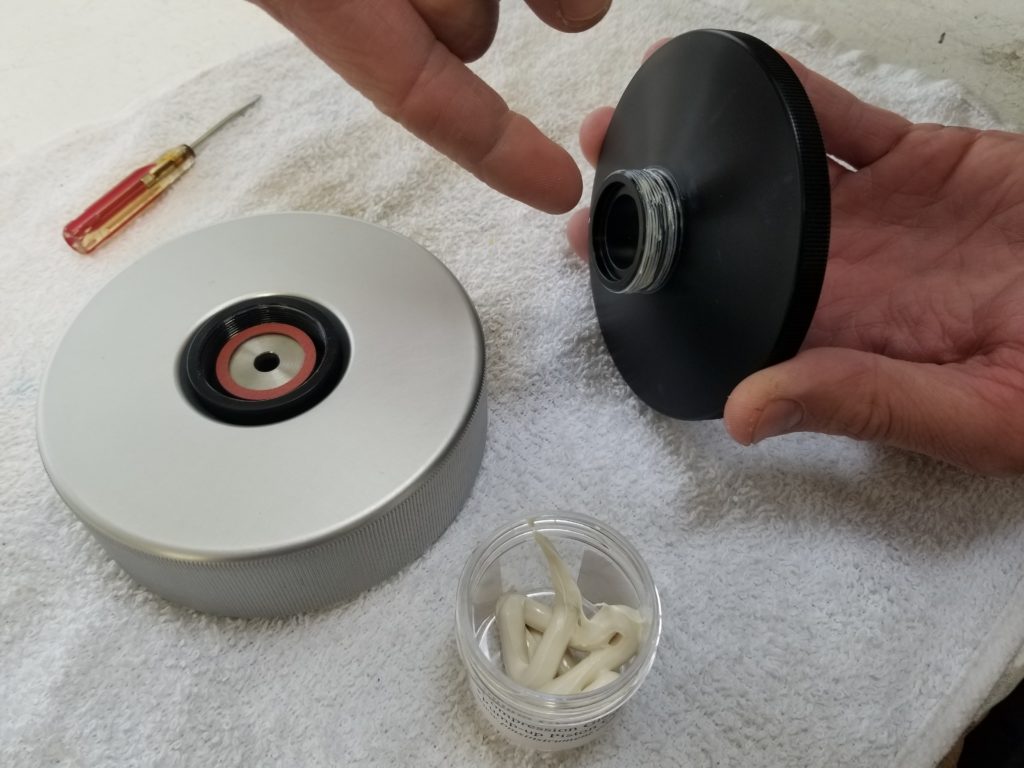
Maintaining the Compression Gland Lid is simple. The O-ring around the Compression Gland Base should be kept clean and lubricated with petroleum jelly. Occasionally unscrew the Compression Gland Screw and take out the Compression Gland Insert and Compression Gland Gasket inside for cleaning. We recommend lubricating the Compression Gland Screw and Base threads with a lubricant like Lithium Grease to maintain the threads and ensure safe and easy operation. Clean the Compression Gland Gasket with ARMOR ALL or some other type of rubber conditioner for optimal use. Over time the compression gland gasket will become worn and should be replaced. If additional gaskets are needed, you may purchase them directly from PMS Instrument Company.
The threads of the Compression Gland Base and Screw should be inspected at this time for wear. If the two parts do not thread together easily or they are discolored or deformed in any way, contact PMS Instrument Company for replacement parts.
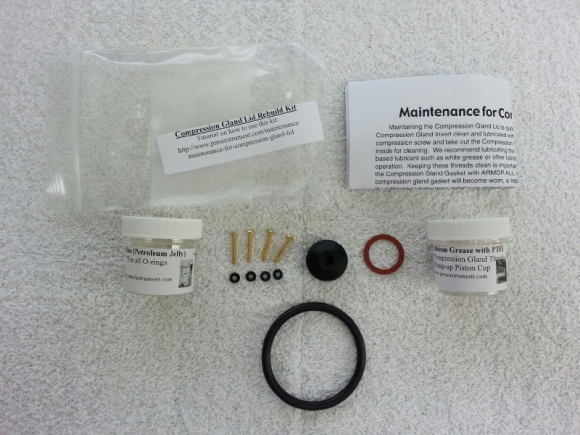
This is the “Compression Gland Lid rebuild kit”. When ordering this kit, specify which size Compression Gland Gasket you want.

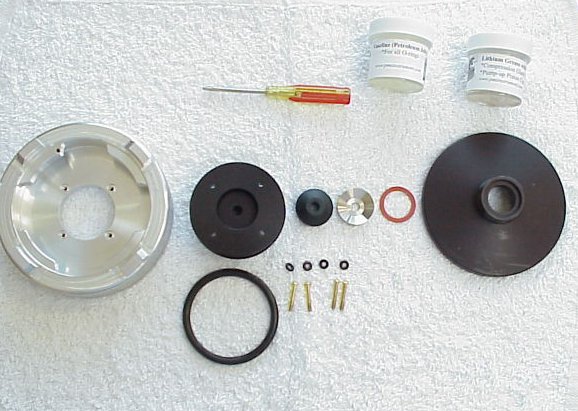
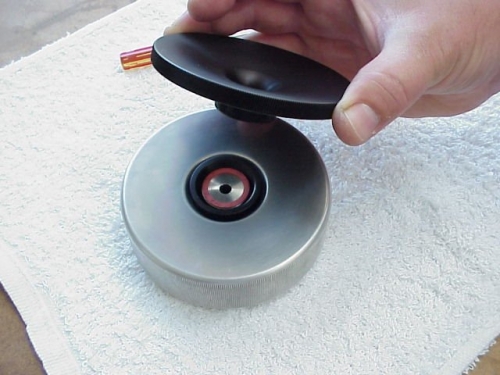
Here is the Compression Gland Lid dis-mantled
Parts from left to right are:
- Chamber Lid
- Compression Gland Base – O-Ring below it.
- Compression Gland Gasket – (size 006 O-Rings and screws below)
- Compression Gland Insert
- Fiber Friction Washer
- Compression Gland Screw
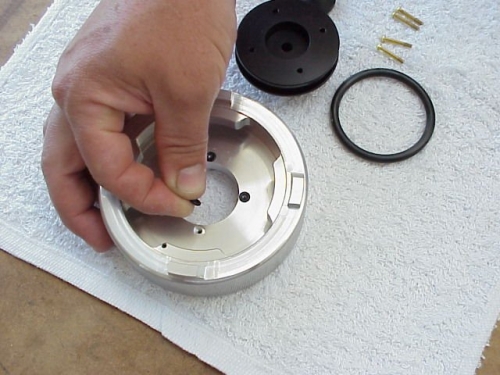
Lubricate each small (size 006) O-Ring lightly with petroleum jelly and place into recessed screw hole.
Next, lubricate the large (size 330) O-Ring and place over the Compression Gland Base.
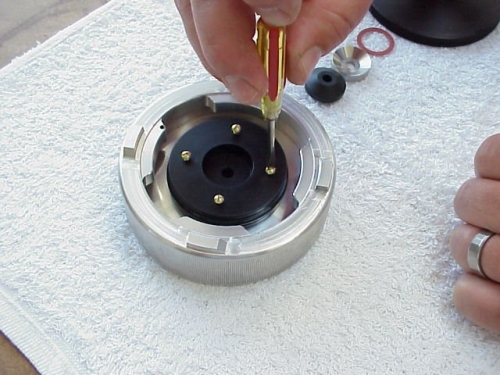
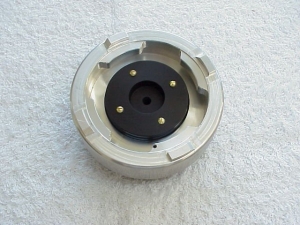
Slide the Compression Gland Base into the lid, align the screws and tighten down screws into place.
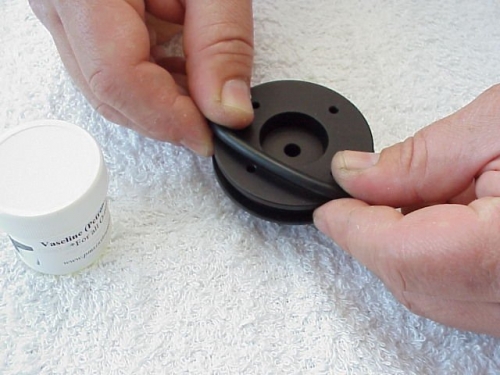
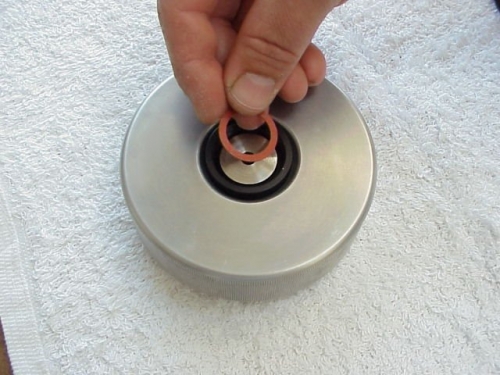
Flip over the lid and install the Compression Gland Gasket into the Compression Gland Base.
You can clean this with Armor All or other type of rubber conditioner for optimal operation.
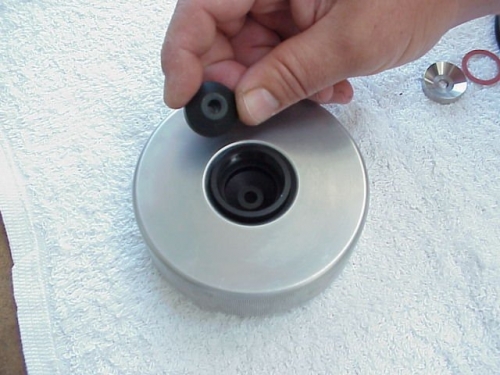
Next, place the Compression Gland Insert over the Compression Gland Gasket. Flat side facing up.
If your instrument is equipped with the Almond Sealing System, place the Insert flat side down.
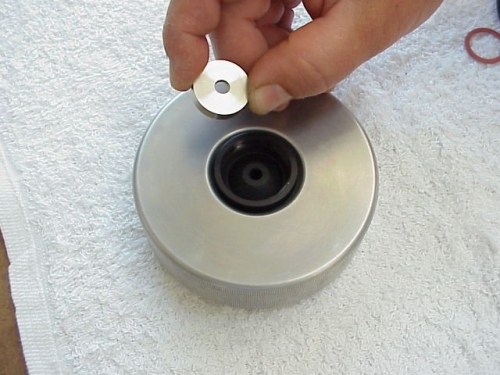
Put the Friction Washer on top of the Compression Gland Insert.
Lubricate the threads of the Compression Gland Screw lightly with white Lithium Grease.
Install the Compression Gland Screw into the Compression Gland Base. To ensure proper alignment, turn the Compression Gland Screw counter-clockwise 1/4 turn or until you feel the thread engage.
Care should be taken to not cross-thread the two pieces.
When tightening the Compression Gland Screw, be careful not to crush the Friction Washer.
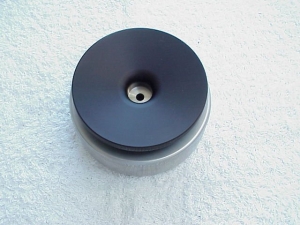
The Compression Gland Cover is now ready for use and should look like the above pictures.